
This page will go through the integration of the Stripe payment platform with SendX. This integration will enable data flowing from Stripe into SendX for analysis of a customer's Lifetime Value and tracking every transaction's value and status on Stripe.
With this, you will be able to assign and segregate your paying vs non-paying customers on Stripe and use their paying behavior to segregate and retarget them later.
The following is the procedure:
-
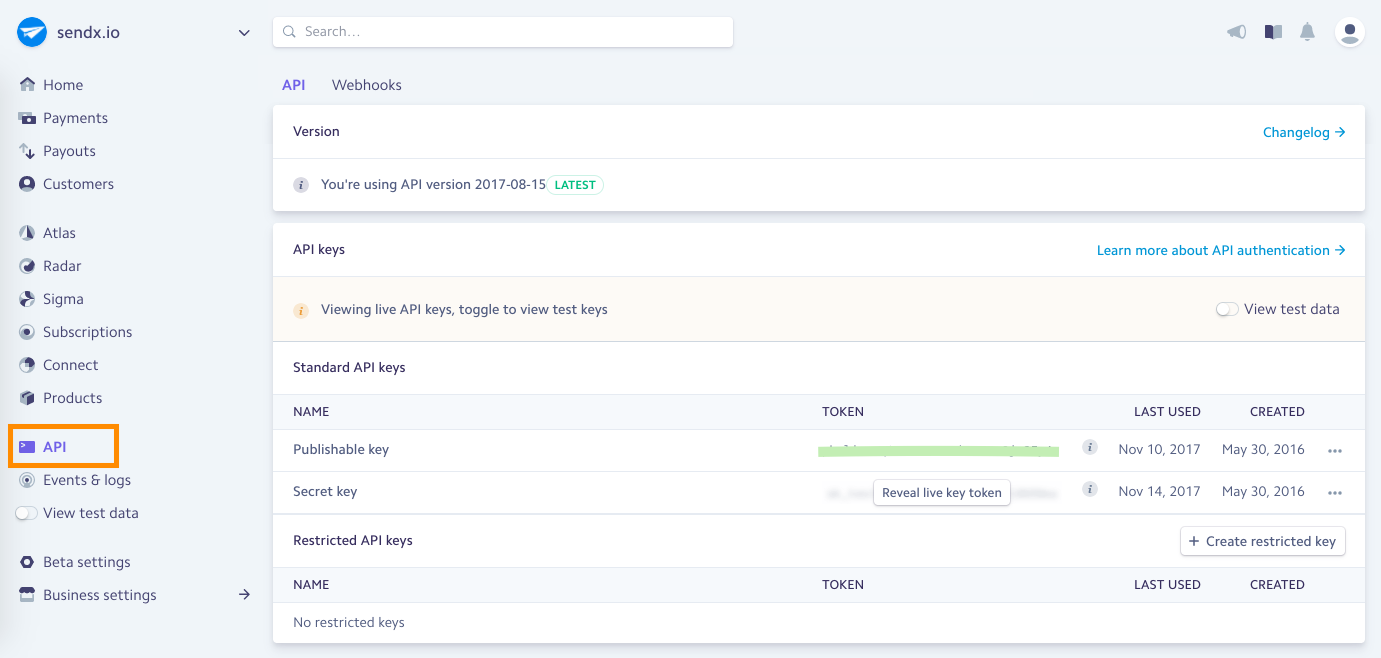
Go to the API section from the Stripe Dashboard.
-
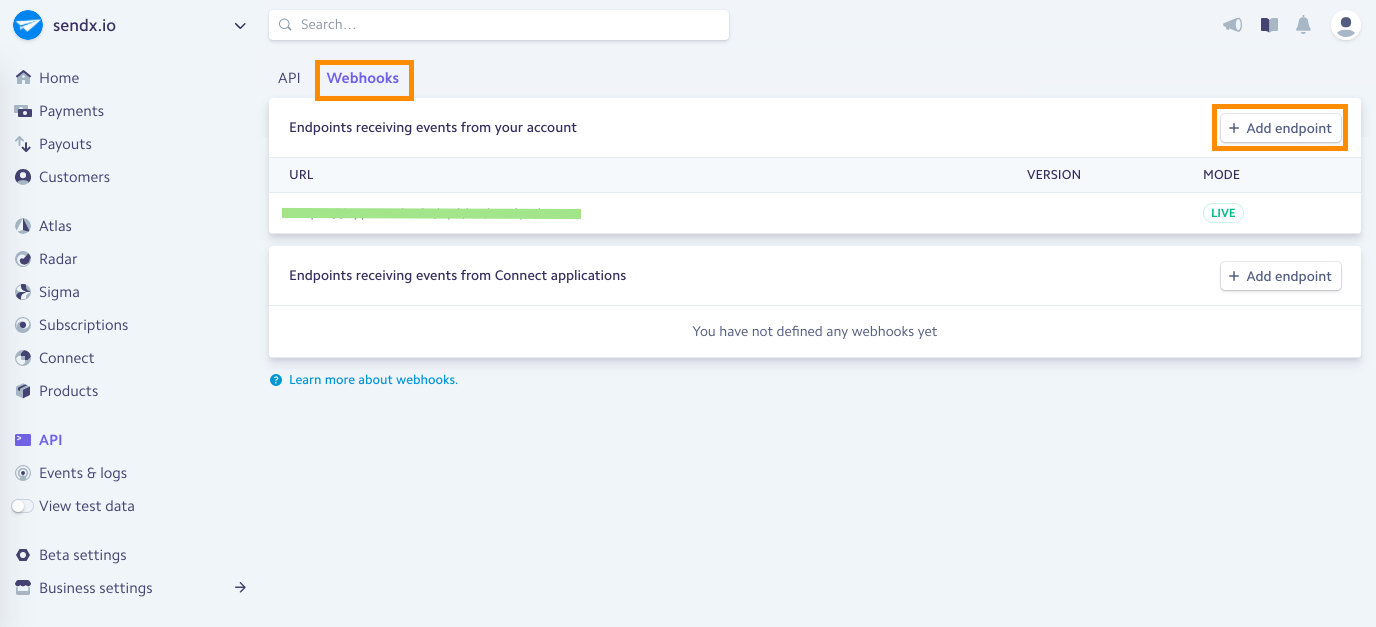
Select the Webhooks tab and click on + Add endpoint.
-
Press on View test data on the left sidebar if you want to test with dummy data before running on Live data.
-
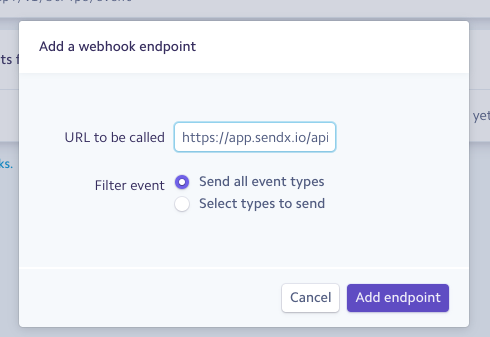
Enter the following URL on the modal window that pops up and when done, click on the Add endpoint button:
https://app.sendx.io/api/v1/integration/stripe/team/<team_id>
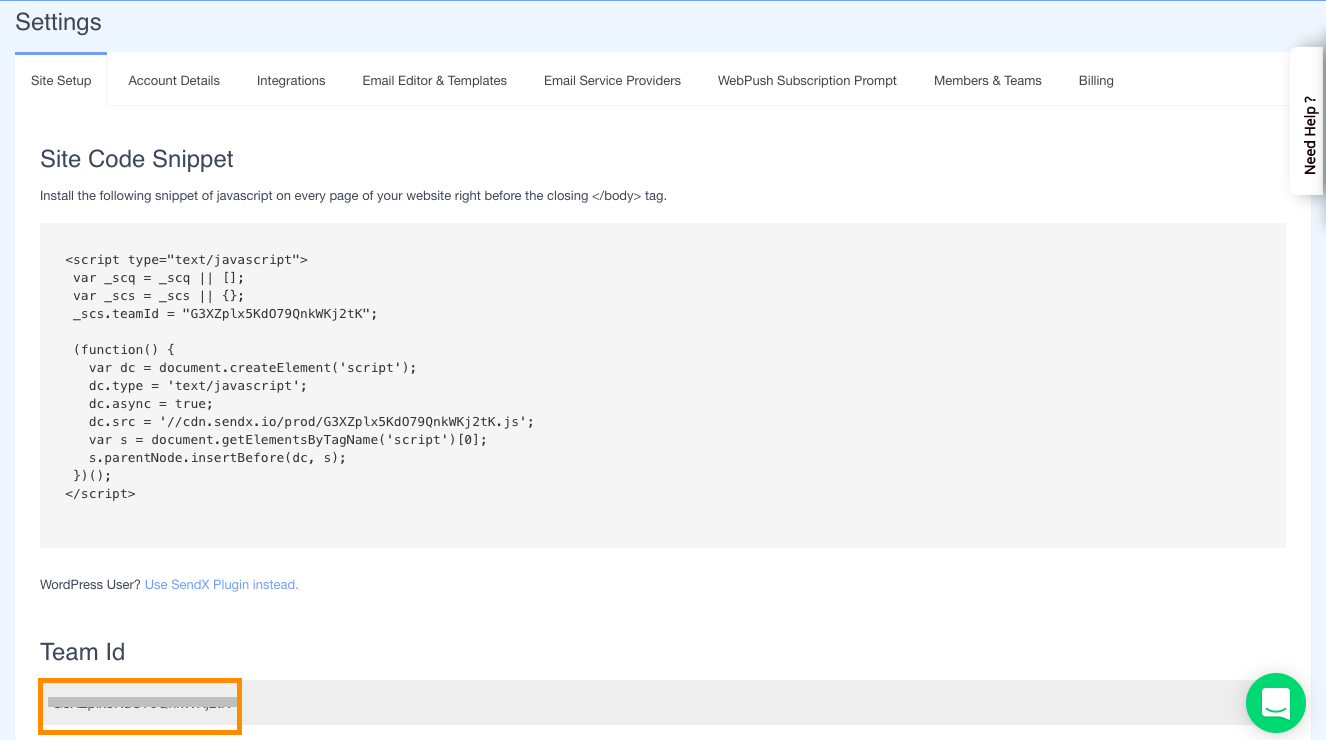
This <team_id> can be obtained from the SendX Settings > Site Setup tab.
-
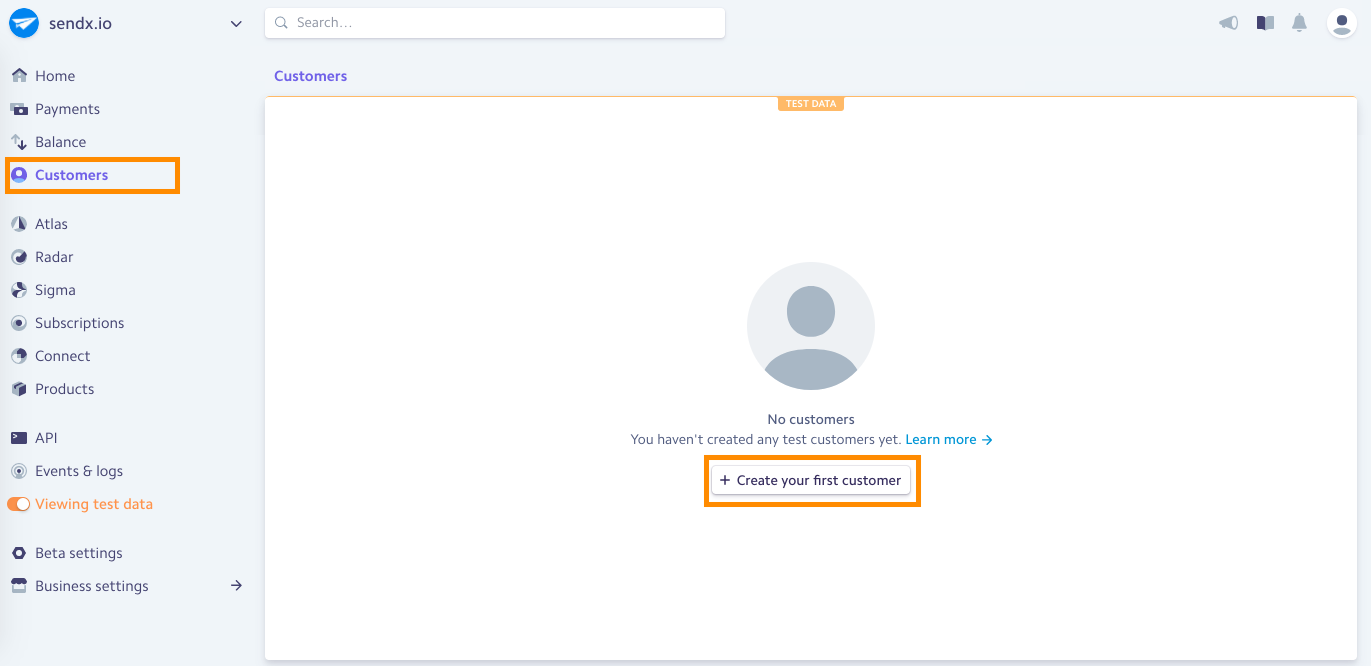
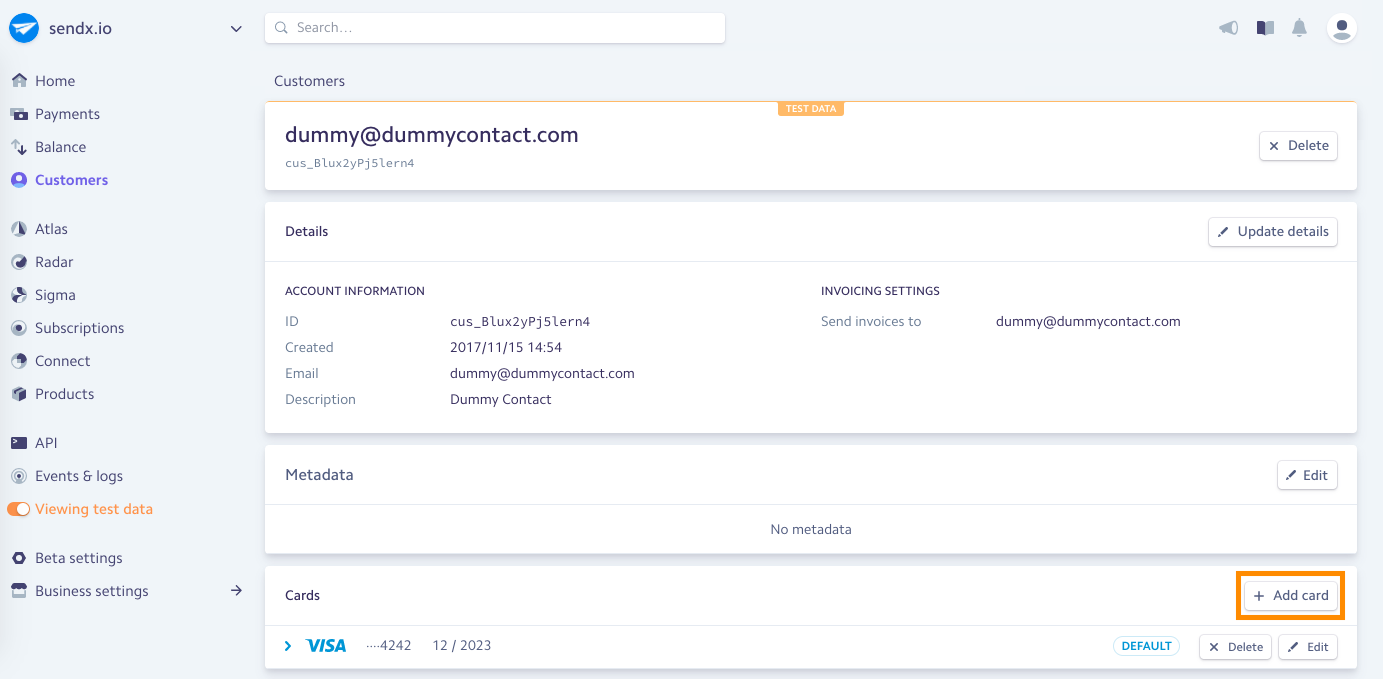
The integration is now done. To test it, you'd need to do you can create a customer in the View test data mode, add suitable details to him/her; and create a charge for it to show up on SendX. The following screenshots should help you in doing this:
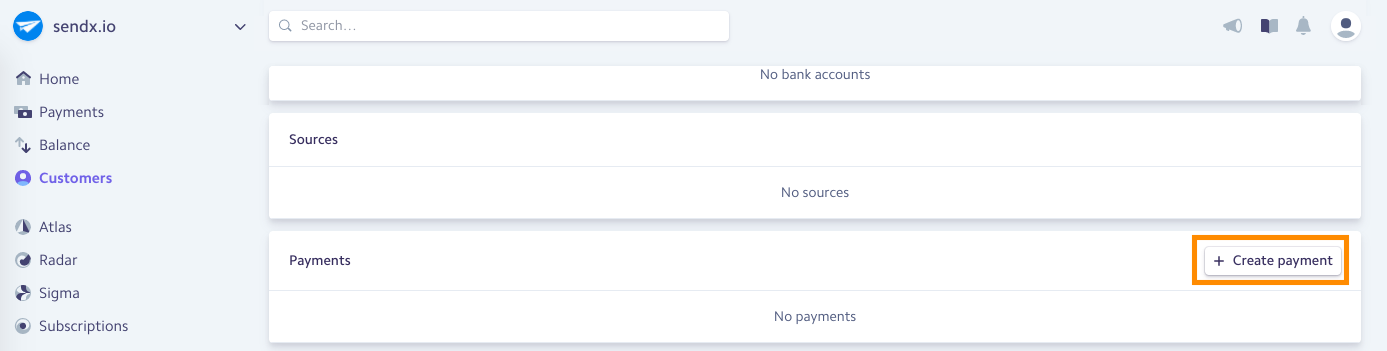
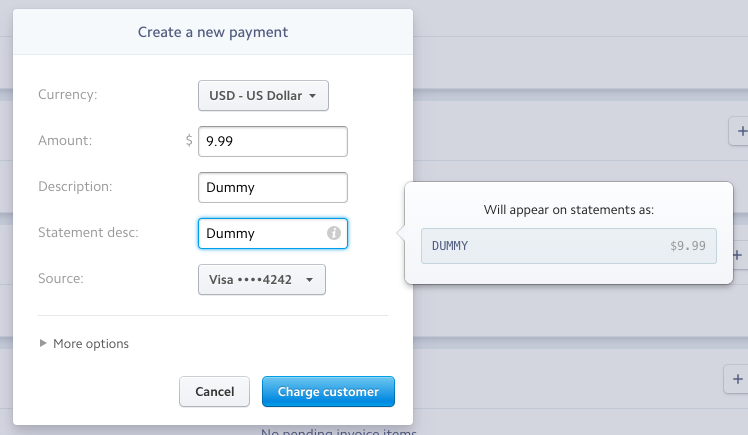
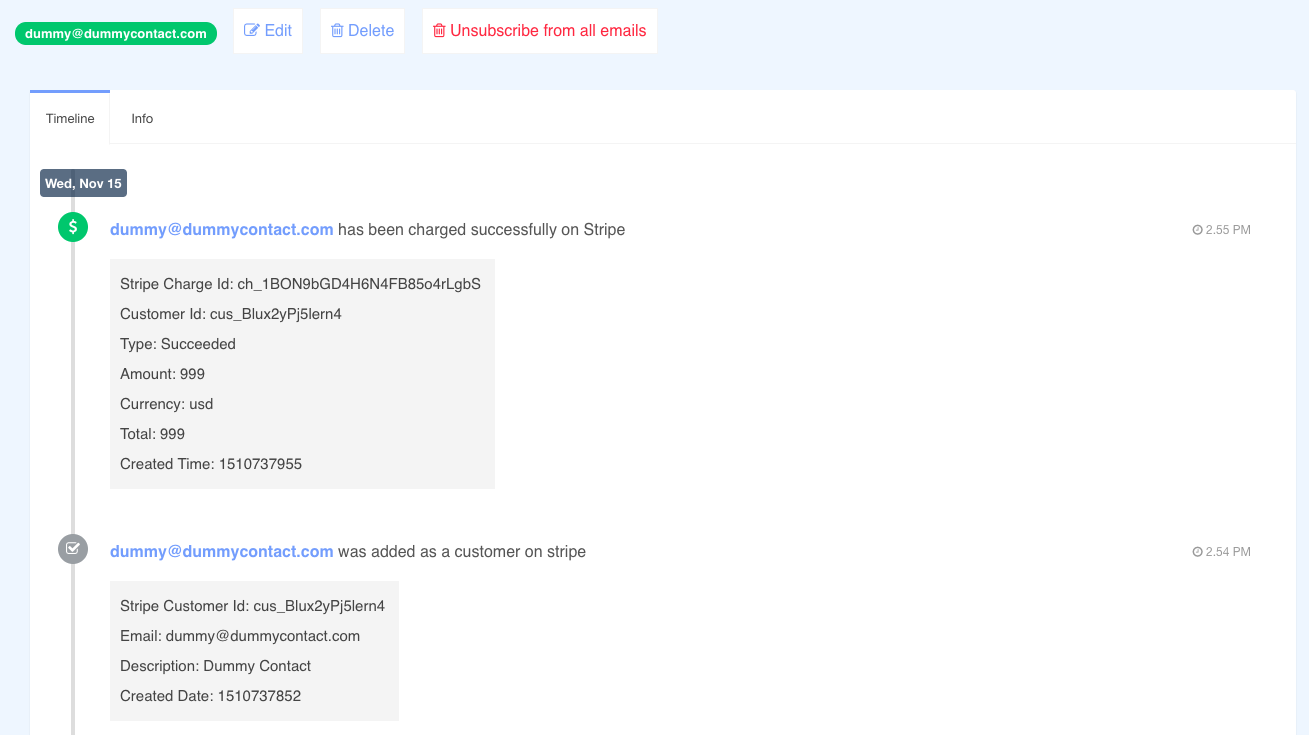
Now, click the Charge Customer button to charge a test customer and view the final contact on SendX as follows:
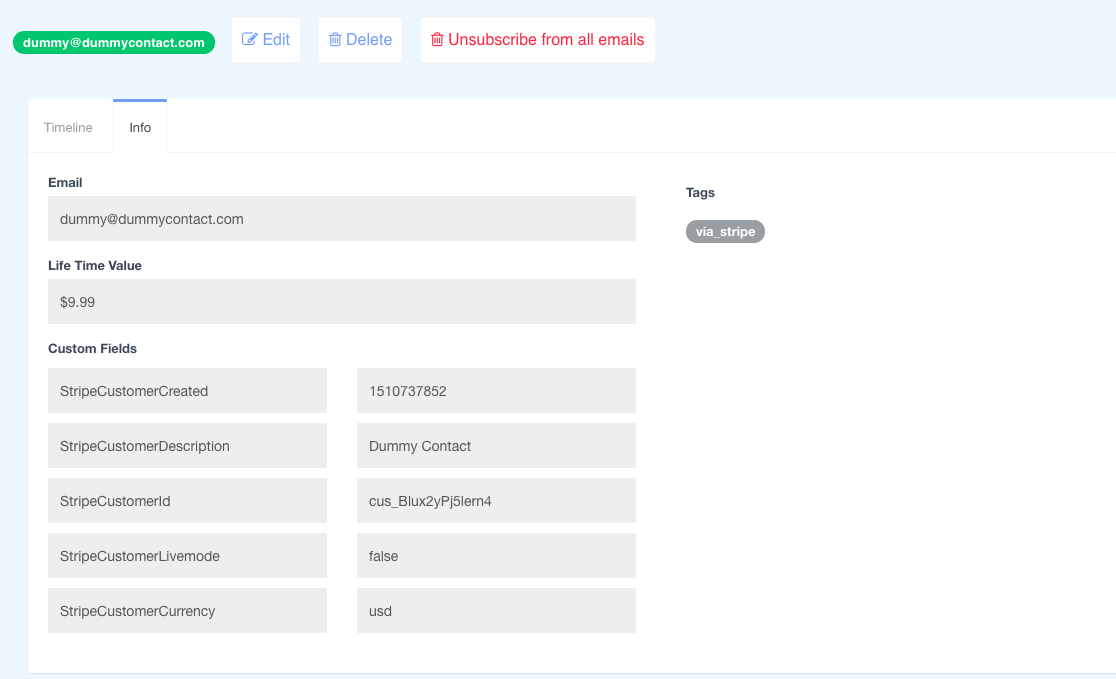
Voila! You have successfully integrated SendX with Stripe payments. Stripe Customer's details are saved for the SendX contact with StripeCustomer- prefix and a via_stripe tag is added to all customers added through Stripe. You may view this information on the Info tab of the contact:
Instructions for SendX V2
This page will go through the integration of the Stripe payment platform with SendX. This integration will enable data flowing from Stripe into SendX for analysis of a customer's Lifetime Value and tracking every transaction's value and status on Stripe.
With this, you will be able to assign and segregate your paying vs non-paying customers on Stripe and use their paying behavior to segregate and retarget them later.
The following is the procedure:
-
Go to the API section from the Stripe Dashboard.

-
Select the Webhooks tab and click on + Add endpoint.

-
Press on View test data on the left sidebar if you want to test with dummy data before running on Live data.
-
Enter the following URL on the modal window that pops up and when done, click on the Add endpoint button:
https://app.sendx.io/api/v1/integration/stripe/team/<team_API>

This <team_API> can be obtained from the SendX Settings > Site Setup tab.

-
The integration is now done. To test it, you'd need to do you can create a customer in the View test data mode, add suitable details to him/her; and create a charge for it to show up on SendX. The following screenshots should help you in doing this:


Now, click the Charge Customer button to charge a test customer and view the final contact on SendX as follows:

Voila! You have successfully integrated SendX with Stripe payments. Stripe Customer's details are saved for the SendX contact with StripeCustomer- prefix and a via_stripe tag is added to all customers added through Stripe. You may view this information on the Info tab of the contact:

That's all, folks!
Did this answer your question?